How to Change a Flat Tire on the Toyota Auris
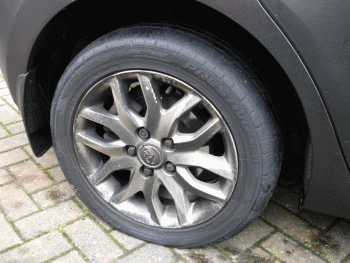
Flat rear tire on my Toyota Auris!
Flat Tire?
Here is how I changed my flat tire on my Toyota Auris. As with all occasional maintenance tasks, it has a number of little trips, traps and eventual disappointments.
First of all, was the tire really flat? Sadly, yes, it was – which I realized when I visited not one but two service stations and used their compressed air pump. I could not re-inflate the tire sufficiently. As well as being flat, it may have a valve problem. On top of that, the tire refitting place was shut. So I had no choice but to change the tire myself.
First of all, was the tire really flat? Sadly, yes, it was – which I realized when I visited not one but two service stations and used their compressed air pump. I could not re-inflate the tire sufficiently. As well as being flat, it may have a valve problem. On top of that, the tire refitting place was shut. So I had no choice but to change the tire myself.
Steps to Change a Flat Tire on the Toyota Auris
- Get all the equipment ready.
- Lay out your tire tools.
- Locate the jack position on the car.
- Unlock the wheel nuts.
- Change the wheel.
Yep. That tire is definitely flat. Bother it.
1. Get All of the Equipment Ready
The relative wisdom of experience says to get everything prepared and ready before starting any job.
So initially, it was a case of locating the parts (this being the first time I have changed a tire on this model of car).
The spare is obviously in the boot (there being nowhere else to put it). I found the spare under the boot cover.
Unfortunately, it is a space-saving tire. This means that it is going to be a temporary replacement only.
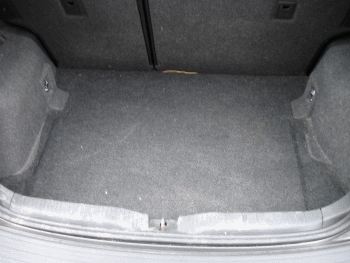
Picture of boot – now where's that tire?

Space-saving spare tire - how disappointing
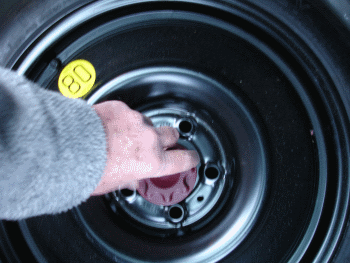
Unscrewing the spare tire retainer
2. Tools and Jack Location
The tire tools are under the spare tire in the boot.
The jack is hidden away in the right-hand boot storage compartment.
Turn its screw slightly so it can be removed from its holding position.
The jack is hidden away in the right-hand boot storage compartment.
Turn its screw slightly so it can be removed from its holding position.

Tool bag in tire recess
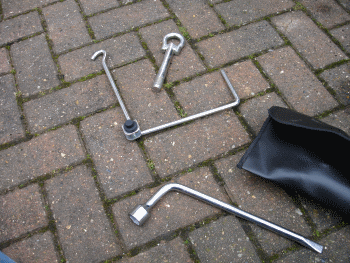
Tire tools - spanner, jack handle and... tow bar thing.
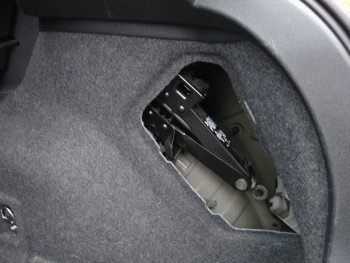
The jack is hidden away in the right hand boot compartment
3. Locate the Jack Position on the Car
Under the car is a ridge that runs the length of the body.
Look for identifying marks or notches.
I 'think' the two indentations shown in the picture are the right place to locate the jack, and that is what I used.
Look for identifying marks or notches.
I 'think' the two indentations shown in the picture are the right place to locate the jack, and that is what I used.
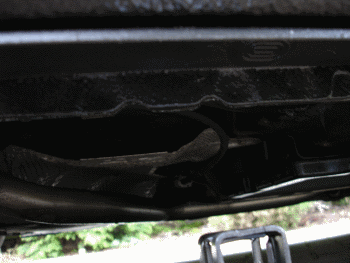
Use the two little indentations to position the jack which goes either side of that ridge.
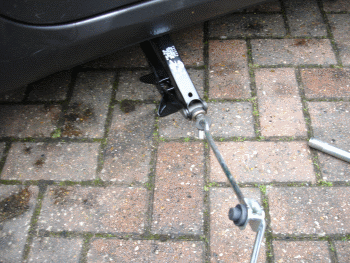
Jack in position and ready to go
4. Unlock the Wheel Nuts
I don't know why they bother with this stuff. I suppose some people have expensive wheels, and they live in places where they might get stolen. I don't.
If you have an odd-looking nut on your wheels, then you probably have locking wheel nuts. The box could generally be anywhere – it is fairly small – but a popular place is rattling around in the glove compartment.
Identify the socket and the nut on the wheel. It is fairly obvious how it works.
If you have an odd-looking nut on your wheels, then you probably have locking wheel nuts. The box could generally be anywhere – it is fairly small – but a popular place is rattling around in the glove compartment.
Identify the socket and the nut on the wheel. It is fairly obvious how it works.
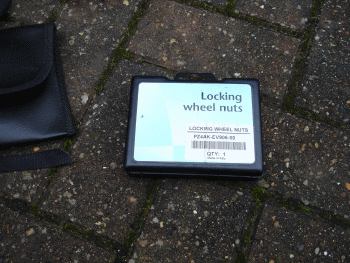
Locking wheel nut box
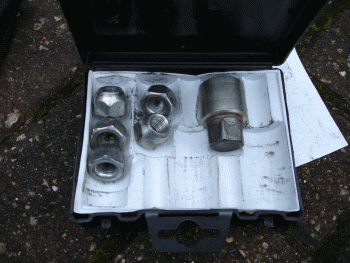
The locking wheel nut collection
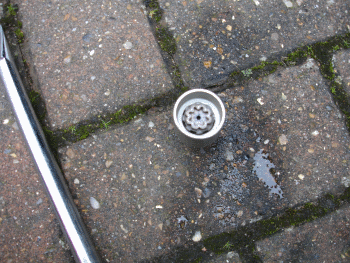
The locking wheel nut socket
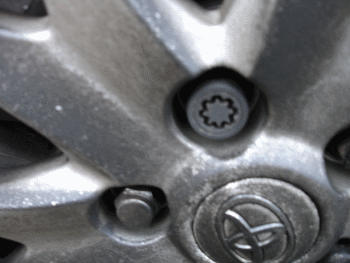
Locking wheel nut showing the teeth locators
Space Saving Tires
These are a great idea if you never have to use them.
If you do have to use them, they are a complete waste of time and effort. I don't want to have to change my tires twice. I want to put the spare on and continue driving the old-fashioned way.
With space savers, they will get you where you need to go. They will also need changing at the first opportunity as they are for emergency use only. They are not particularly safe or suitable for your vehicle.
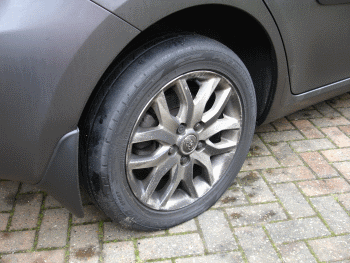
Compare the tires in the picture below. One is perfectly safe for your driving, apart from being flat. The other is not.
If you do have to use them, they are a complete waste of time and effort. I don't want to have to change my tires twice. I want to put the spare on and continue driving the old-fashioned way.
With space savers, they will get you where you need to go. They will also need changing at the first opportunity as they are for emergency use only. They are not particularly safe or suitable for your vehicle.
Compare the tires in the picture below. One is perfectly safe for your driving, apart from being flat. The other is not.
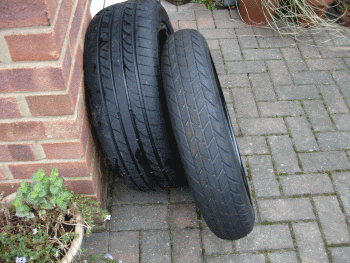
Comparison of original tire and space-saving temporary replacement tire
5. Change the Wheel
Use the jack to slightly lift the car. Do NOT lift the wheel off the ground yet. Make sure the car and jack seem to be a solid and safe fit.
Now use the tire spanner to loosen SLIGHTLY the bolts holding the old tire on. The point of this is to make sure they all can be loosened. There is no point in jacking up the car, taking four nuts off and discovering you cannot remove the last one because it is stuck. Yes. It does happen.
When all the nuts, including the locking one, are slightly loosened, use the jack to raise the car so the wheel is free from the ground.
Undo all the nuts and carefully and gently pull the wheel off. Do not force or shake anything. There is a small piece of metal (the jack) holding up the weight of the car. Do not do anything stupid.
Move the old wheel completely out of the way. Bring the spare tire into position. Use minimum force to put the tire onto the car. Do the bolts up finger-tight to start with, and then take turns to gently tighten them with the spanner.
Continue until the wheel looks and feels solid.
Lower the jack carefully, keeping a close eye on the car, wheel, tires and your toes.
When the jack is completely lowered, recheck all the bolts with your spanner.
Take the car for a short, gentle hundred-yard trip with the stereo off so you can listen for any odd sounds. When you stop, recheck the tire bolts again.
Pack the tools away and wash your hands. The old tire will not fit in the boot space, so you will have to leave it flat in the boot or elsewhere for now until you get it replaced properly.
Drive with caution on the space-saving spare.
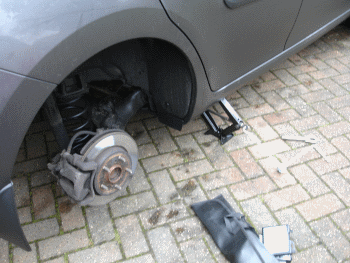
Old tire removed
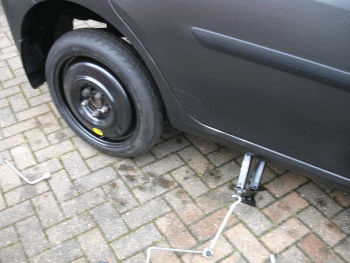
Jack and spare tire in position
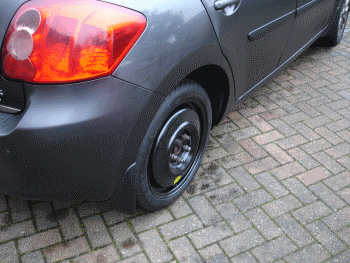
Spare tire now installed.
Job Done!
Thank goodness that's over.
Hope you have good luck with yours, or you find someone nice to do it for you.
Hope you have good luck with yours, or you find someone nice to do it for you.