How to Replace a Tail Light Bulb on Toyota Auris
The tail light on my Toyota Auris stopped working
Toyota Auris Brake Light Bulb Replacement
You may be the sort of practical person who regularly checks their lights before setting off on a journey. If you don't spend so much time checking your car, you may wonder why people are flashing their lights at you everywhere you travel. It might be that your daring driving style has upset them, but, occasionally, they will be flashing to let you know your lights are not working.
Changing a tail light bulb is a simple, if slightly confusing, task. Even for the non-mechanically minded, it is quite straightforward to do. Your first job is to switch your lights on and check around the car to see if any are not working. In this case, it is the tail light.
Changing a tail light bulb is a simple, if slightly confusing, task. Even for the non-mechanically minded, it is quite straightforward to do. Your first job is to switch your lights on and check around the car to see if any are not working. In this case, it is the tail light.
Buy a New Bulb
You might think the first thing to do is to go and buy a new bulb. That is what I did. I went to my local car part shop and asked for a bulb for my Toyota Auris. A knowledgeable guy gave me a bulb and I paid for it. Now I was ready to do the job.
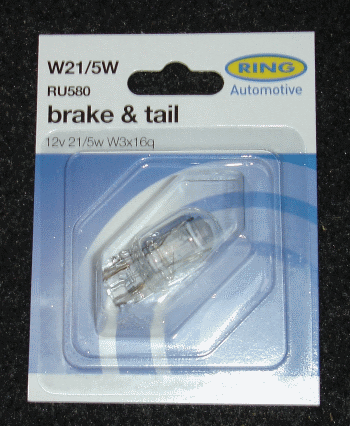
New tail light bulb - make sure you get the right one!
Find the Light Access Point
Remove all the garbage that you carry around in the boot. After half an hour of solid work, you should have a clear space to work in.
There are access points on either side on the wall of the boot. Undo the fairly obvious clips and the cover can be removed.
There are access points on either side on the wall of the boot. Undo the fairly obvious clips and the cover can be removed.

Light compartment cover in rear boot
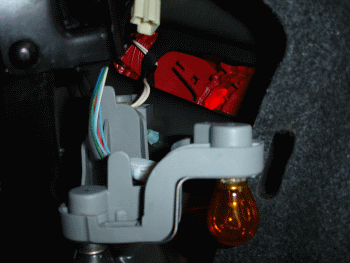
The Tail Light Puzzle
It is really difficult to see anything without climbing into the boot. In addition, it is dark inside the hatch. And finally—even when you can see—nothing is obvious. Which bit goes where? What do you unscrew? Use a torch to have a look and familiarise yourself with the position of wires and retainers.
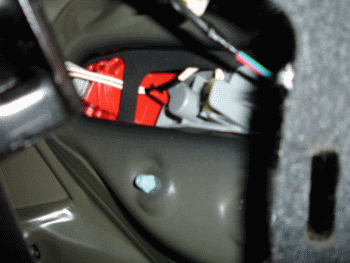
Tail light assembly with cover removed
Lights in Close-Up
Using a camera is a good way to get a decent view of the assembly. You can point the camera to the exact place and the flashlight will illuminate the area. As you can see from the photo, it is STILL hard to see what goes where.
What I discovered is that the red section and the grey section are separate—so you determine which one to remove depending on the bulb position. For the tail light, it is the grey section.
What I discovered is that the red section and the grey section are separate—so you determine which one to remove depending on the bulb position. For the tail light, it is the grey section.
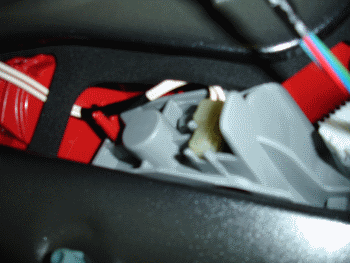
Close up of Toyota Auris tail light assembly
Removing the Assembly
It is virtually impossible to get a picture of this. The assembly is held in with a single plastic bendable clip to the right-hand end. The bit furthest away from the red section. The only way to find this is to feel for it. Gently touch the bulb enclosure until you find the plastic retainer and bend it slightly. Bend it and pull the assembly out. Eventually, the whole grey section should be released. Be careful not to damage or disturb any wires too much.
Note: There are NO screws to remove and no wires to take off. Simply click and pull out.
Note: There are NO screws to remove and no wires to take off. Simply click and pull out.
Tail light assembly removed
Check the Bulb
The bulbs are bayonet fitting. Undo as you would a normal house light bulb. At this point, I compared the damaged bulb with the nice new one I had purchased. They were completely different!
The sensible thing to do is to remove the old bulb and take it with you when you buy the new one. That way you can make sure they are the same.
The sensible thing to do is to remove the old bulb and take it with you when you buy the new one. That way you can make sure they are the same.
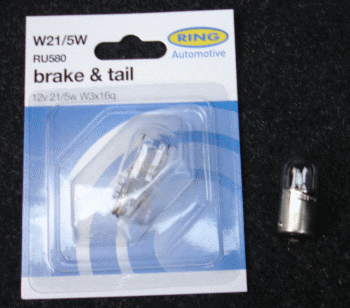
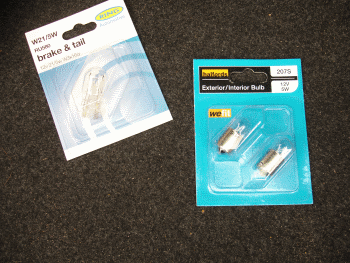
I bought the wrong bulb!
Back to the Shop
I bought a new set of bulbs from a different store. Comparing the old bulb helped a lot and it was a simple and cheap transaction. Now I was ready to finally fix that tail light!
The correct bulbs are purchased!
Fit the New Bulb
Put the correct bulb into its bayonet fitting. Fiddle around randomly attempting to get the whole unit back into where it came from. This is like putting a puzzle piece back into position. Be gentle and patient and it will eventually find the right place and click back in.
Replace the boot cover and go check the lights are working. Job done!
Replace the boot cover and go check the lights are working. Job done!
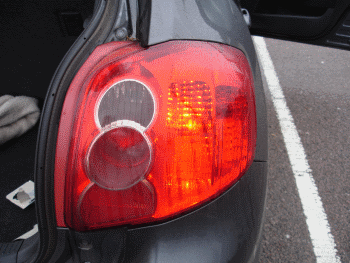
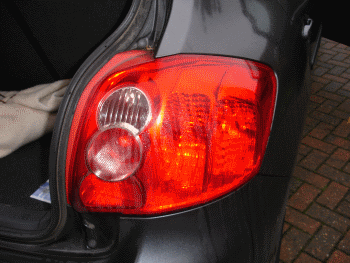
Here is the working tail light - hooray!